
Old House Hardware - Interior Doors
We are lucky that most of the original hardware in our house was in tact, but there are a few doors in our house that have needed a bit of help, and a couple that still do.
in renovations by previous owners over the years, some of the doors were flipped and some hardware was replaced to match the time period of the house, but most of the hardware is still in its original place.
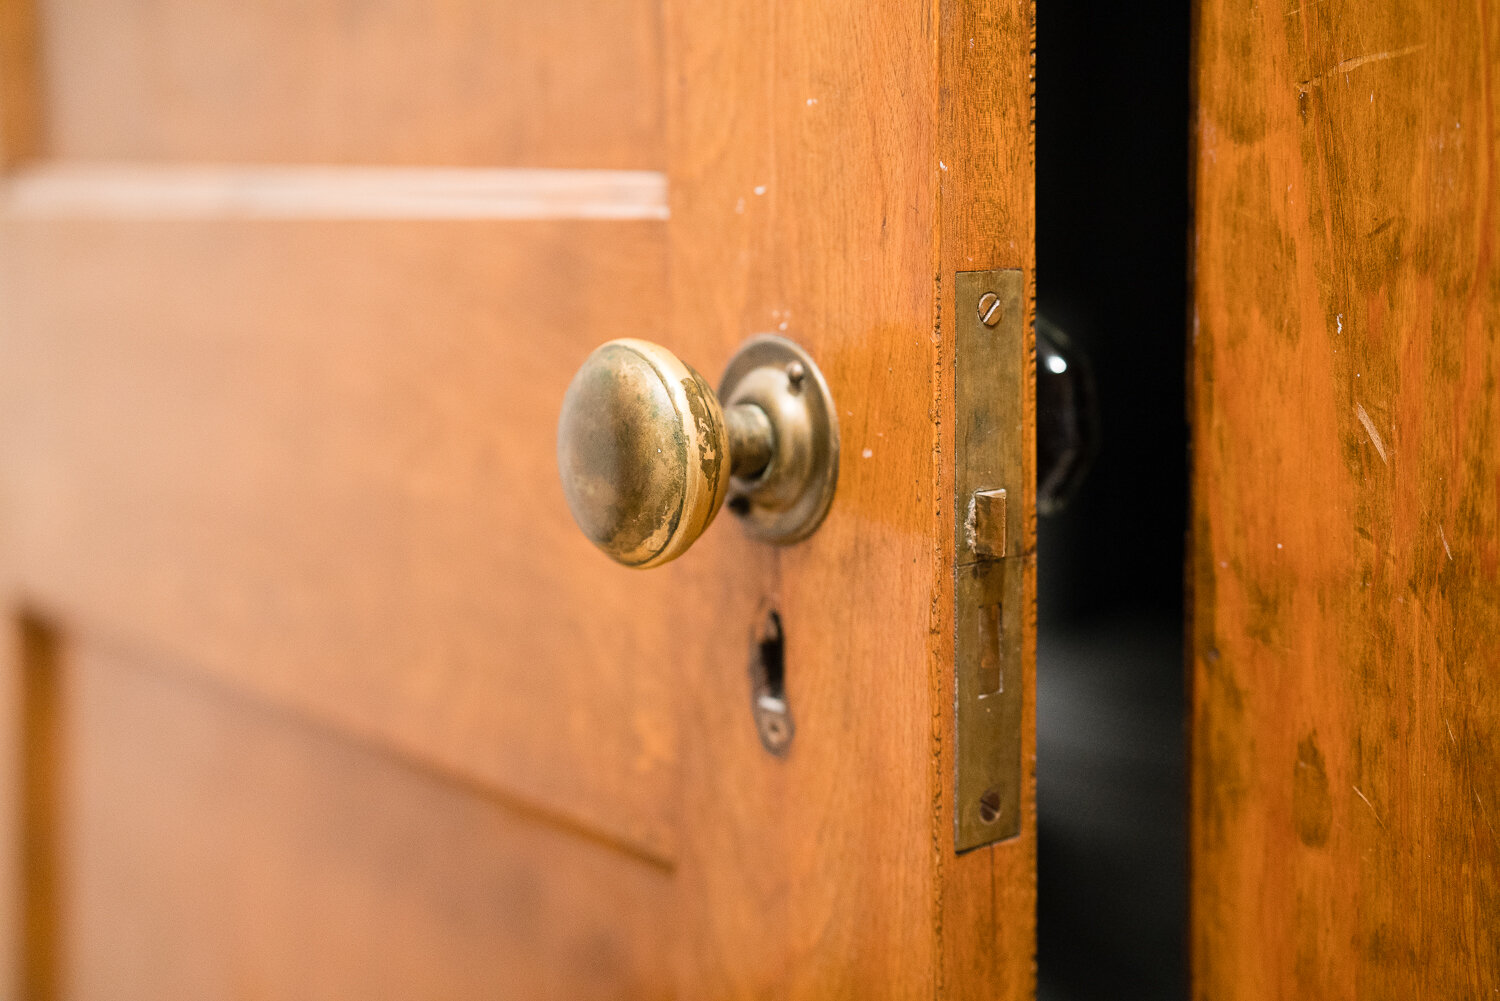
Most of them except…. this set. The mis-matched hardware on this door has been on my mind since we purchased the house. It’s the only brass knob on any of the second floor doors. As much as I love an unlaquered brass knob with some nice patina, she had to go.
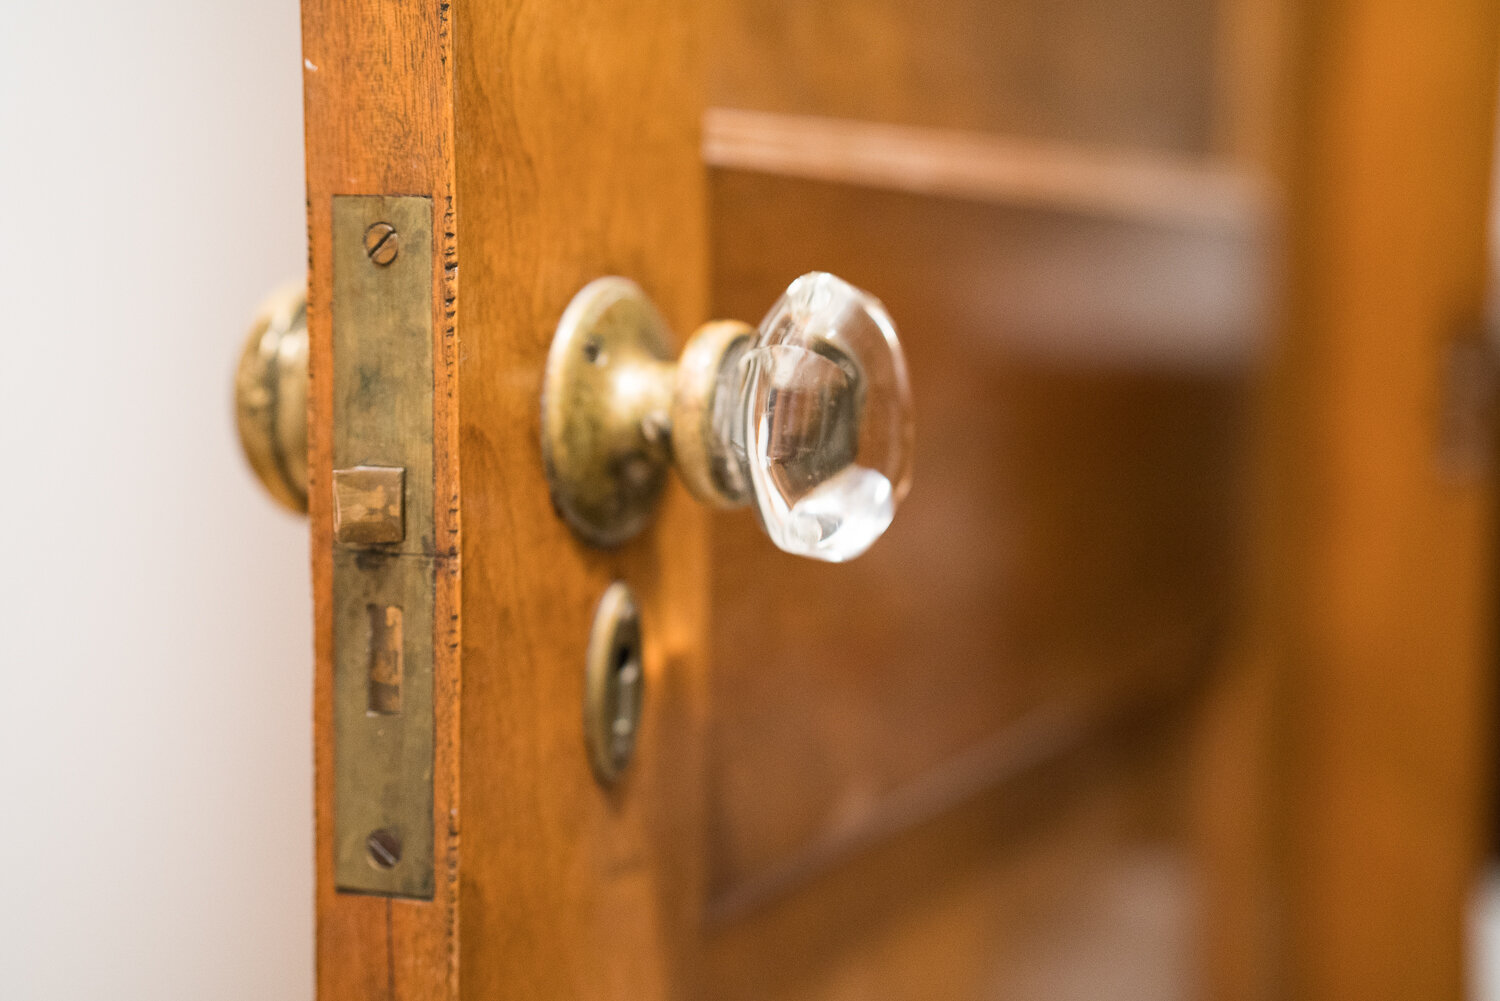
Luckily, we found a crystal knob set in a cabinet in our basement. If you’re in Pittsburgh and looking for hardware replacements, we recommend heading to Construction Junction or Salvaged Pittsburgh. If you happen to be reading from Saint Louis, ReFab is a great source as well.

If you have a house that is about the same age as ours (approximately 1910), you will likely have mortise sets. This tutorial is for you. Mortise lock sets are so named because the hardware is mortised into the door.
Photo credit to House of Antique Hardware, a good source if you are looking to replace a full set of hardware and are trying to match original.

If you have a home built in the 1950’s or after, you will likely have a tubular lock. The majority of new off-the-shelf interior door hardware is tubular.
Photo credit to Rejuvenation, a good source if you are looking to use a new door prepped for a tubular set, but are looking to match the look and feel of an old home.
We are not likely to have a tutorial for interior tubular hardware sets in the near future, as our house does not currently have any. We can offer some sources for purchasing tubular hardware sets, so please let us know if you’re interested in that post in the comments below!
If you have a mortise set, we would recommend taking a look at your spindle before you purchase a knob set or individual pieces of hardware.
Wether you’re investigating your hardware or have your hardware set ready to go, here is the how-to.

Step 1 Remove the set screw. Thats this little guy. We recommend using a screwdriver, not a drill, as the screws can be easily stripped.

Step 2 Try to slide the doorknob off. If it doesn’t slide off, don’t panic! Try to unscrew the doorknob (you may have to place a bit of pressure on the other doorknob to create better torque).

Step 3 Check out your spindle. That rod has two functions - it holds the doorknobs on and also turns the door latch. Our spindles are threaded, so our doorknobs screw on. Some homes that are older than ours often have a spindle that looks like the one below from our front door, which has holes for the set screw to sit onto. Some spindles have a pin to hold them in place. If you need to remove the spindle and you have a pin, you will need to remove it. Sometimes that can mean you need to take off the rosette (the decorative plate that sits against the door).

Step 4 Make sure that if you are replacing parts, that you have the correct spindle size and type. Your mortise set will not accept a spindle that is too big, and it will not turn over with a spindle that is too small. Additionally, knobs are not one size fits all. They are made to fit specific diameter spindles as well.
Once you measure your spindle and identify if your knob needs to be threaded or not, you can source the correct set for your door.


Step 5 If you are replacing one knob you can skip to step 6. If you’re still with us, you can go ahead and slide the spindle through the hole in the mortise.

Step 6 If you have a threaded spindle, screw on your knob. The benefit of a threaded spindle is that it gets you a nice tight fit. If you have a spindle with pre-drilled holes, go ahead and slide on your knob and align the hole for the set screw with one of the pre-drilled holes as best you can. You may not have a perfectly tight fit.

Step 7 Tighten the set screw. Again, we recommend a screwdriver so as not to damage the set screw. We also do not recommend over tightening. A snug fit will do just fine.
Step 8 Step back and admire your work.
We’re still on the lookout for a matching key cover plate to our original one. You may have noticed one side is missing in the photos. One step at a time!
Some of you may be wondering what happened to the unlaquered brass knob we took off the door. We’re keeping it in a storage bin in the basement with a couple of similar knobs. We have future plans for the third floor door hardware (someone painted it all white… gasp!) so we may need them in the future.